Example usages
Let us go trough some different examples of case scenarios. To get a feeling how one could use the library to their advantage with ease and comfort.
Example 1: Numerical features
from kdp.features import NumericalFeature, FeatureType
from kdp.processor import PreprocessingModel, OutputModeOptions

# Define features
features = {
    # 1. Basic float feature (no preprocessing)
    "basic_float": NumericalFeature(
        name="basic_float",
        feature_type=FeatureType.FLOAT
    ),

    # 2. Basic float feature (no preprocessing)
    "basic_float2": NumericalFeature(
        name="basic_float2",
        feature_type=FeatureType.FLOAT
    ),

    # 3. Normalized float feature
    "normalized_float": NumericalFeature(
        name="normalized_float",
        feature_type=FeatureType.FLOAT_NORMALIZED
    ),

    # 4. Rescaled float feature
    "rescaled_float": NumericalFeature(
        name="rescaled_float",
        feature_type=FeatureType.FLOAT_RESCALED,
        scale=2.0  # Optional scale parameter
    ),

    # 5. Discretized float feature
    "discretized_float": NumericalFeature(
        name="discretized_float",
        feature_type=FeatureType.FLOAT_DISCRETIZED,
        bin_boundaries=[0.0, 1.0, 2.0]  # Required for discretization
    ),

    # 6. Custom preprocessing pipeline
    "custom_float": NumericalFeature(
        name="custom_float",
        feature_type=FeatureType.FLOAT,
        preprocessors=[
            tf.keras.layers.Rescaling,
            tf.keras.layers.Normalization,
        ],
        # Additional kwargs for the preprocessors
        bin_boundaries=[0.0, 1.0, 2.0],
        mean=0.0,
        variance=1.0,
        scale=4.0  # Added required scale parameter for Rescaling layer
    ),
}

# Define cross-feature between 2 arbitrary features, though tabular attention would be more useful for feature crossings
feature_crosses = [("normalized_float", "rescaled_float", 10)] # 10 is the number of bins to hash into

# Now we can create a preprocessing model with the features
ppr = PreprocessingModel(
    path_data="sample_data.csv",
    features_specs=features,
    feature_crosses=feature_crosses,
    features_stats_path="features_stats.json",
    overwrite_stats=True,
    output_mode=OutputModeOptions.CONCAT,

    # Add feature selection to get the most important features
    feature_selection_placement="numeric", # Choose between (all_features|numeric|categorical)
    feature_selection_units=32,
    feature_selection_dropout=0.10,

    # Add tabular attention to check for feature interactions
    tabular_attention=True,
    tabular_attention_placement="all_features",  # Choose between (none|numeric|categorical|all_features|multi_resolution)
    tabular_attention_heads=3,                   # Number of attention heads
    tabular_attention_dim=32,                    # Attention dimension
    tabular_attention_dropout=0.1,               # Attention dropout rate
    tabular_attention_embedding_dim=16,          # Embedding dimension
)

# Build the preprocessor
result = ppr.build_preprocessor()

# Transform data using direct model prediction
transformed_data = ppr.model.predict(test_batch)

# Get feature importances
feature_importances = ppr.get_feature_importances()
Visualize the model architecture
You can visualize the model architecture to understand how the features are processed:
ppr.plot_model("numerical_example_model.png")
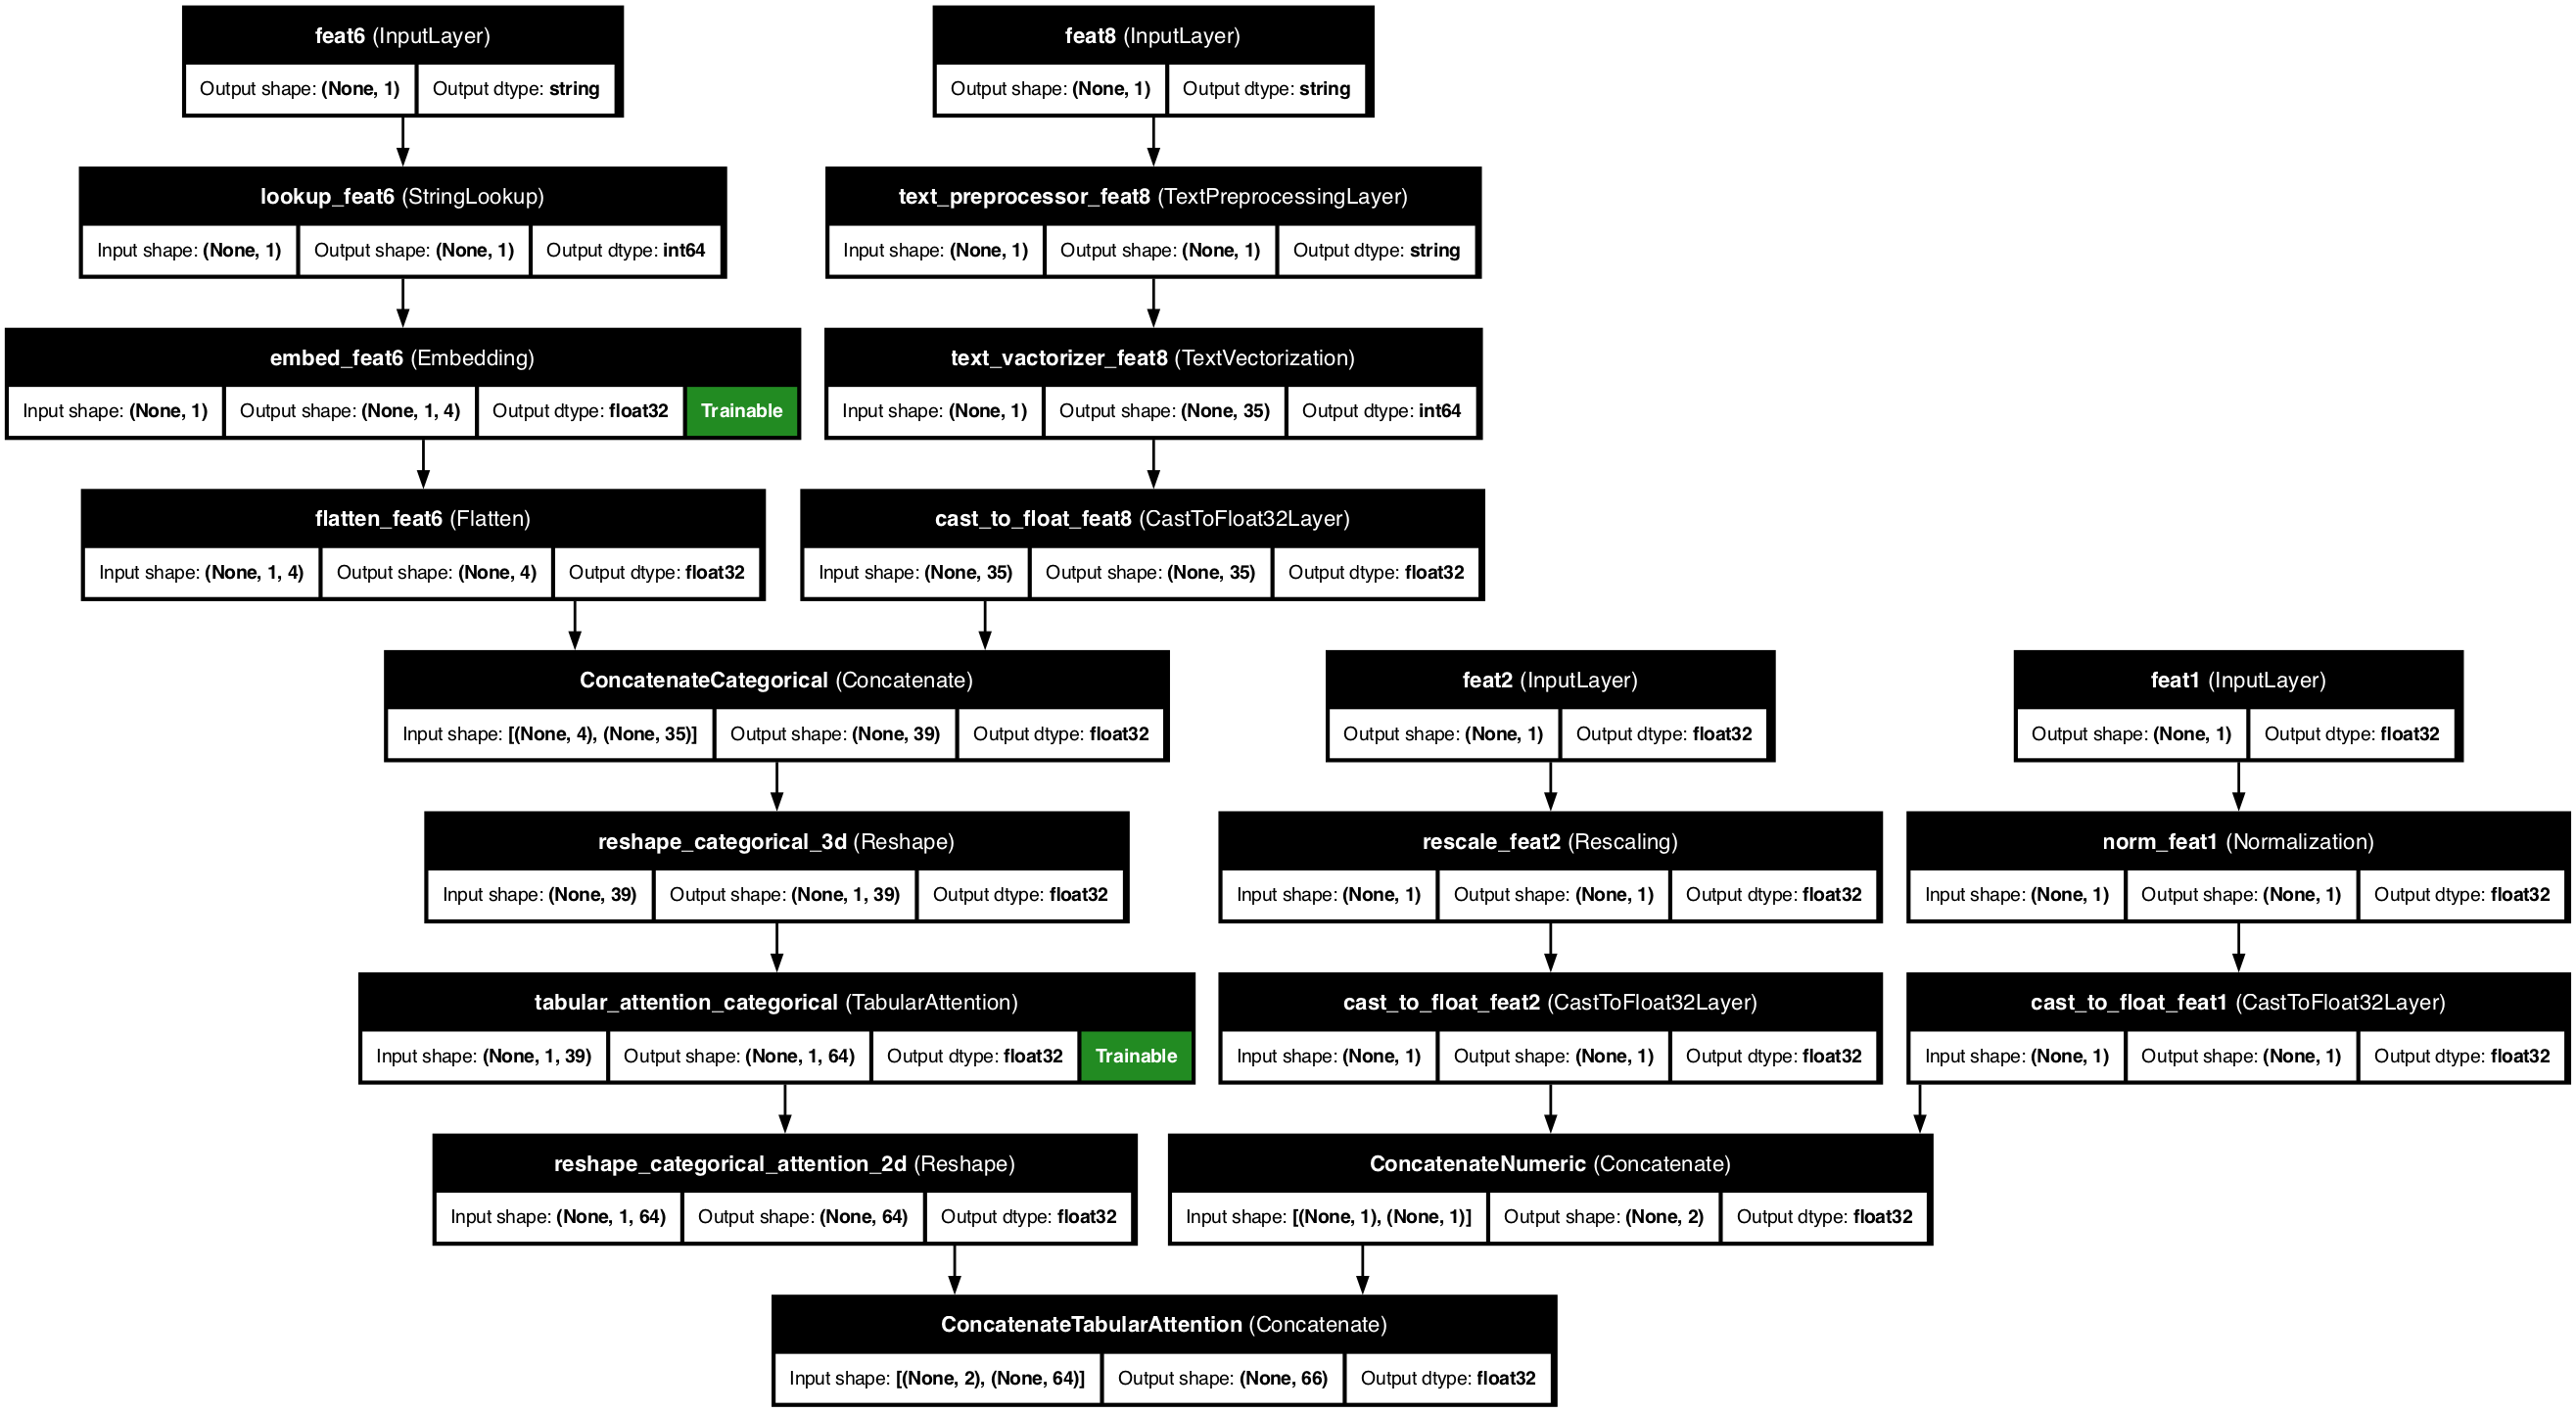
Example 2: Categorical features
from kdp.features import CategoricalFeature, FeatureType, CategoryEncodingOptions
from kdp.processor import PreprocessingModel, OutputModeOptions

# Define features
features = {
    # 1. Basic string categorical feature with embedding
    "basic_category": CategoricalFeature(
        name="basic_category",
        feature_type=FeatureType.STRING_CATEGORICAL,
        category_encoding=CategoryEncodingOptions.EMBEDDING,
        embedding_size=8  # Custom embedding size
    ),

    # 2. Basic integer categorical feature with one-hot encoding
    "basic_int_category": CategoricalFeature(
        name="basic_int_category",
        feature_type=FeatureType.INTEGER_CATEGORICAL,
        category_encoding=CategoryEncodingOptions.ONE_HOT_ENCODING
    ),

    # 3. High cardinality categorical feature with embedding
    "high_card_category": CategoricalFeature(
        name="high_card_category",
        feature_type=FeatureType.STRING_CATEGORICAL,
        category_encoding=CategoryEncodingOptions.EMBEDDING,
        # embedding size will be automatically determined based on cardinality
    ),

    # 4. Binary categorical feature with one-hot encoding
    "binary_category": CategoricalFeature(
        name="binary_category",
        feature_type=FeatureType.STRING_CATEGORICAL,
        category_encoding=CategoryEncodingOptions.ONE_HOT_ENCODING
    ),
}

feature_crosses = [("basic_category", "basic_int_category", 8)]  # Using existing features

# Now we can create a preprocessing model with the features
ppr = PreprocessingModel(
    path_data="sample_data.csv",
    features_specs=features,
    feature_crosses=feature_crosses,
    features_stats_path="features_stats.json",
    overwrite_stats=True,
    output_mode=OutputModeOptions.CONCAT,

    # Add feature selection
    feature_selection_placement="categorical",
    feature_selection_units=32,
    feature_selection_dropout=0.1,

    # Add tabular attention
    tabular_attention=True,
    tabular_attention_placement="categorical",  # Apply attention only to categorical features
    tabular_attention_heads=4,
    tabular_attention_dim=32,
    tabular_attention_dropout=0.1,
    tabular_attention_embedding_dim=16,

    # Add transformer blocks to make it learn sophisticated feature interactions
    transfo_nr_blocks=2,
    transfo_nr_heads=4,
    transfo_ff_units=32,
    transfo_dropout_rate=0.1,
    transfo_placement="categorical",  # Apply transformer only to categorical features
)

# Build the preprocessor
result = ppr.build_preprocessor()

# Transform data using direct model prediction
transformed_data = ppr.model.predict(test_batch)

# Get feature importances
feature_importances = ppr.get_feature_importances()
You can visualize the model architecture:
ppr.plot_model("categorical_example_model.png")
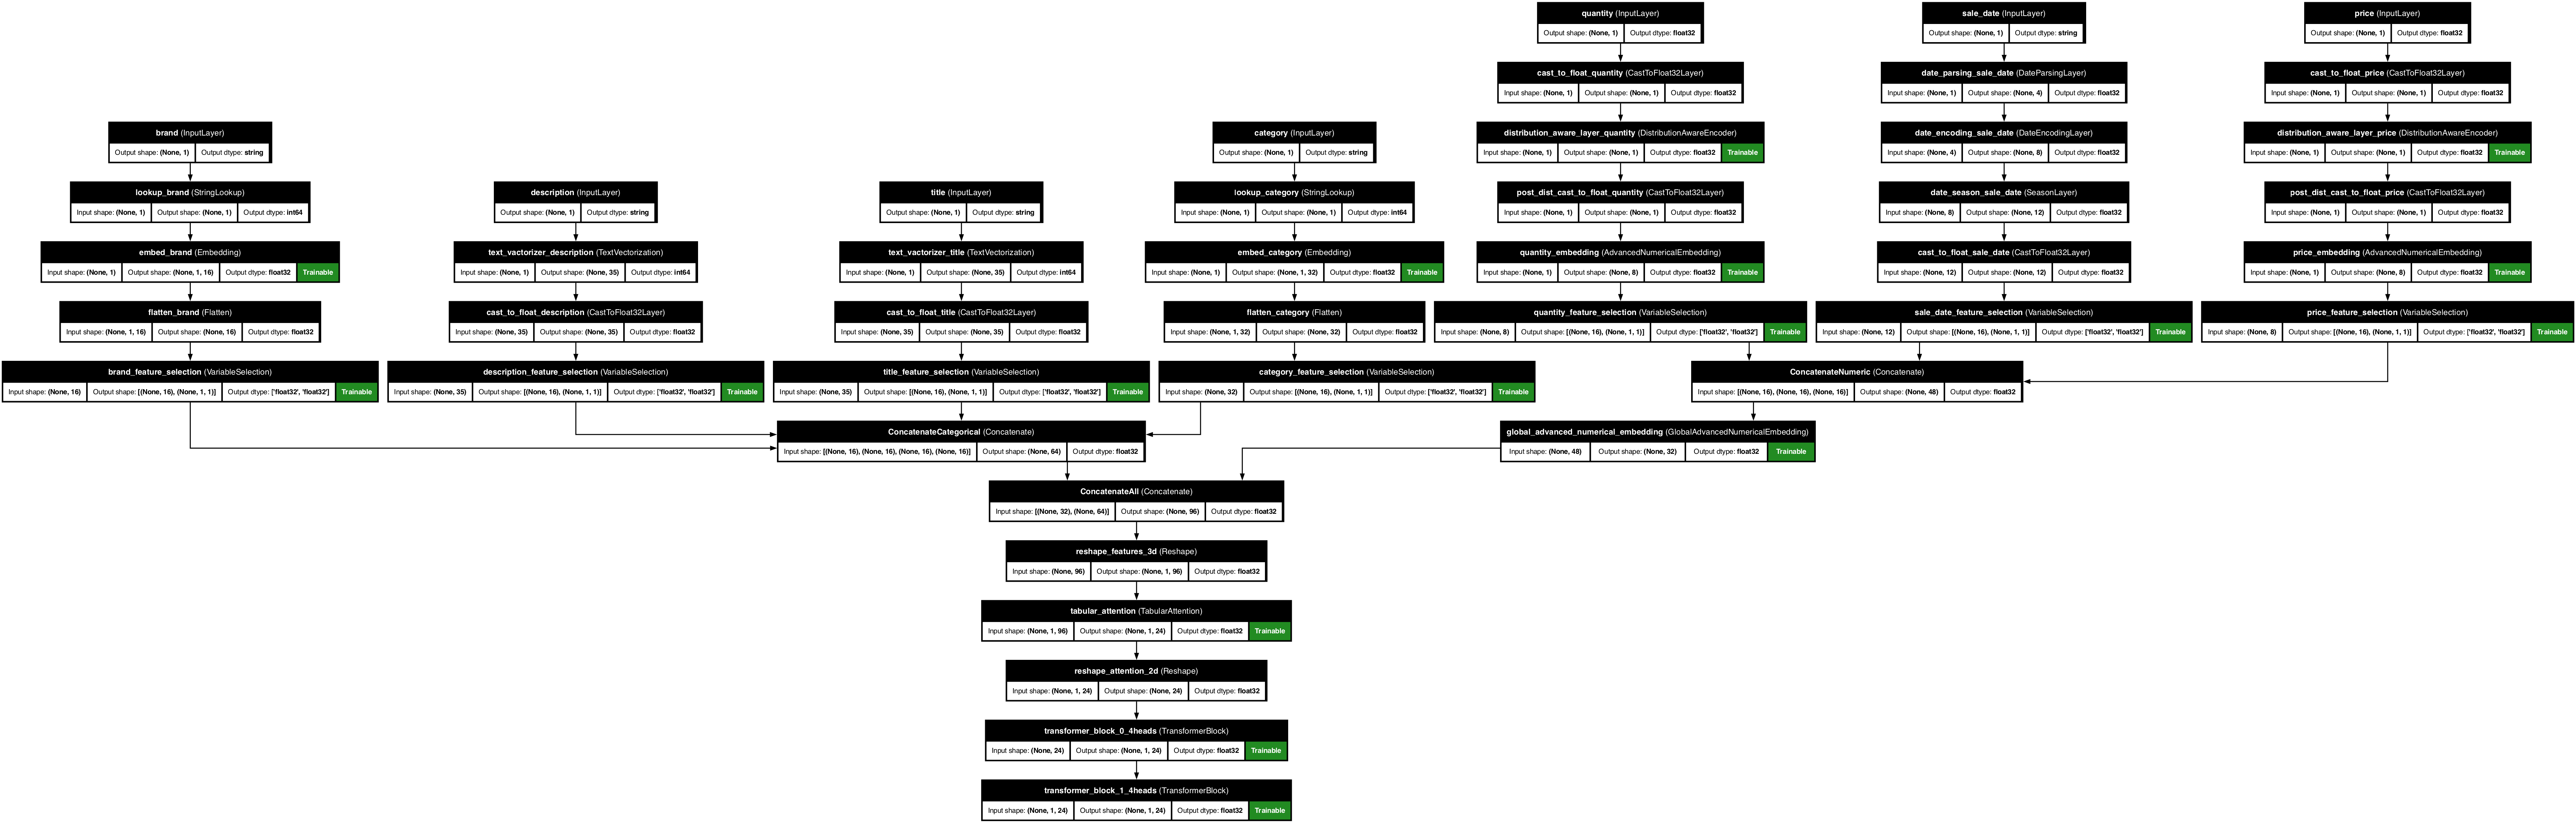
Example 3: Multi-feature model
from kdp.features import NumericalFeature, CategoricalFeature, TextFeature, DateFeature, FeatureType
from kdp.processor import PreprocessingModel, OutputModeOptions

# Define features
features = {
    # Numerical features
    "price": NumericalFeature(
        name="price",
        feature_type=FeatureType.FLOAT_NORMALIZED
    ),
    "quantity": NumericalFeature(
        name="quantity",
        feature_type=FeatureType.FLOAT_RESCALED,
        scale=1.0
    ),

    # Categorical features
    "category": CategoricalFeature(
        name="category",
        feature_type=FeatureType.STRING_CATEGORICAL,
        embedding_size=32
    ),
    "brand": CategoricalFeature(
        name="brand",
        feature_type=FeatureType.STRING_CATEGORICAL,
        embedding_size=16
    ),

    # Text features
    "description": TextFeature(
        name="description",
        feature_type=FeatureType.TEXT,
        max_tokens=100
    ),
    "title": TextFeature(
        name="title",
        feature_type=FeatureType.TEXT,
        max_tokens=50, # max number of tokens to keep

    ),

    # Date features
    "sale_date": DateFeature(
        name="sale_date",
        feature_type=FeatureType.DATE,
        add_season=True, # adds one-hot season indicator (summer, winter, etc) defaults to False
    )
}

# Create preprocessor with both transformer blocks and attention
ppr = PreprocessingModel(
    path_data="sample_data.csv",
    features_stats_path="features_stats.json",
    overwrite_stats=True,             # Force stats generation, recommended to be set to True
    features_specs=features,
    output_mode=OutputModeOptions.CONCAT,

    # Transformer block configuration
    transfo_placement="all_features",  # Choose between (categorical|all_features)
    transfo_nr_blocks=2,              # Number of transformer blocks
    transfo_nr_heads=4,               # Number of attention heads in transformer
    transfo_ff_units=64,              # Feed-forward units in transformer
    transfo_dropout_rate=0.1,         # Dropout rate for transformer

    # Tabular attention configuration
    tabular_attention=True,
    tabular_attention_placement="all_features",  # Choose between (none|numeric|categorical|all_features| multi_resolution)
    tabular_attention_heads=3,                   # Number of attention heads
    tabular_attention_dim=32,                    # Attention dimension
    tabular_attention_dropout=0.1,               # Attention dropout rate
    tabular_attention_embedding_dim=16,          # Embedding dimension

    # Feature selection configuration
    feature_selection_placement="all_features", # Choose between (all_features|numeric|categorical)
    feature_selection_units=32,
    feature_selection_dropout=0.15,
)

# Build the preprocessor
result = ppr.build_preprocessor()
You can visualize the model architecture:
ppr.plot_model("complex_model.png")

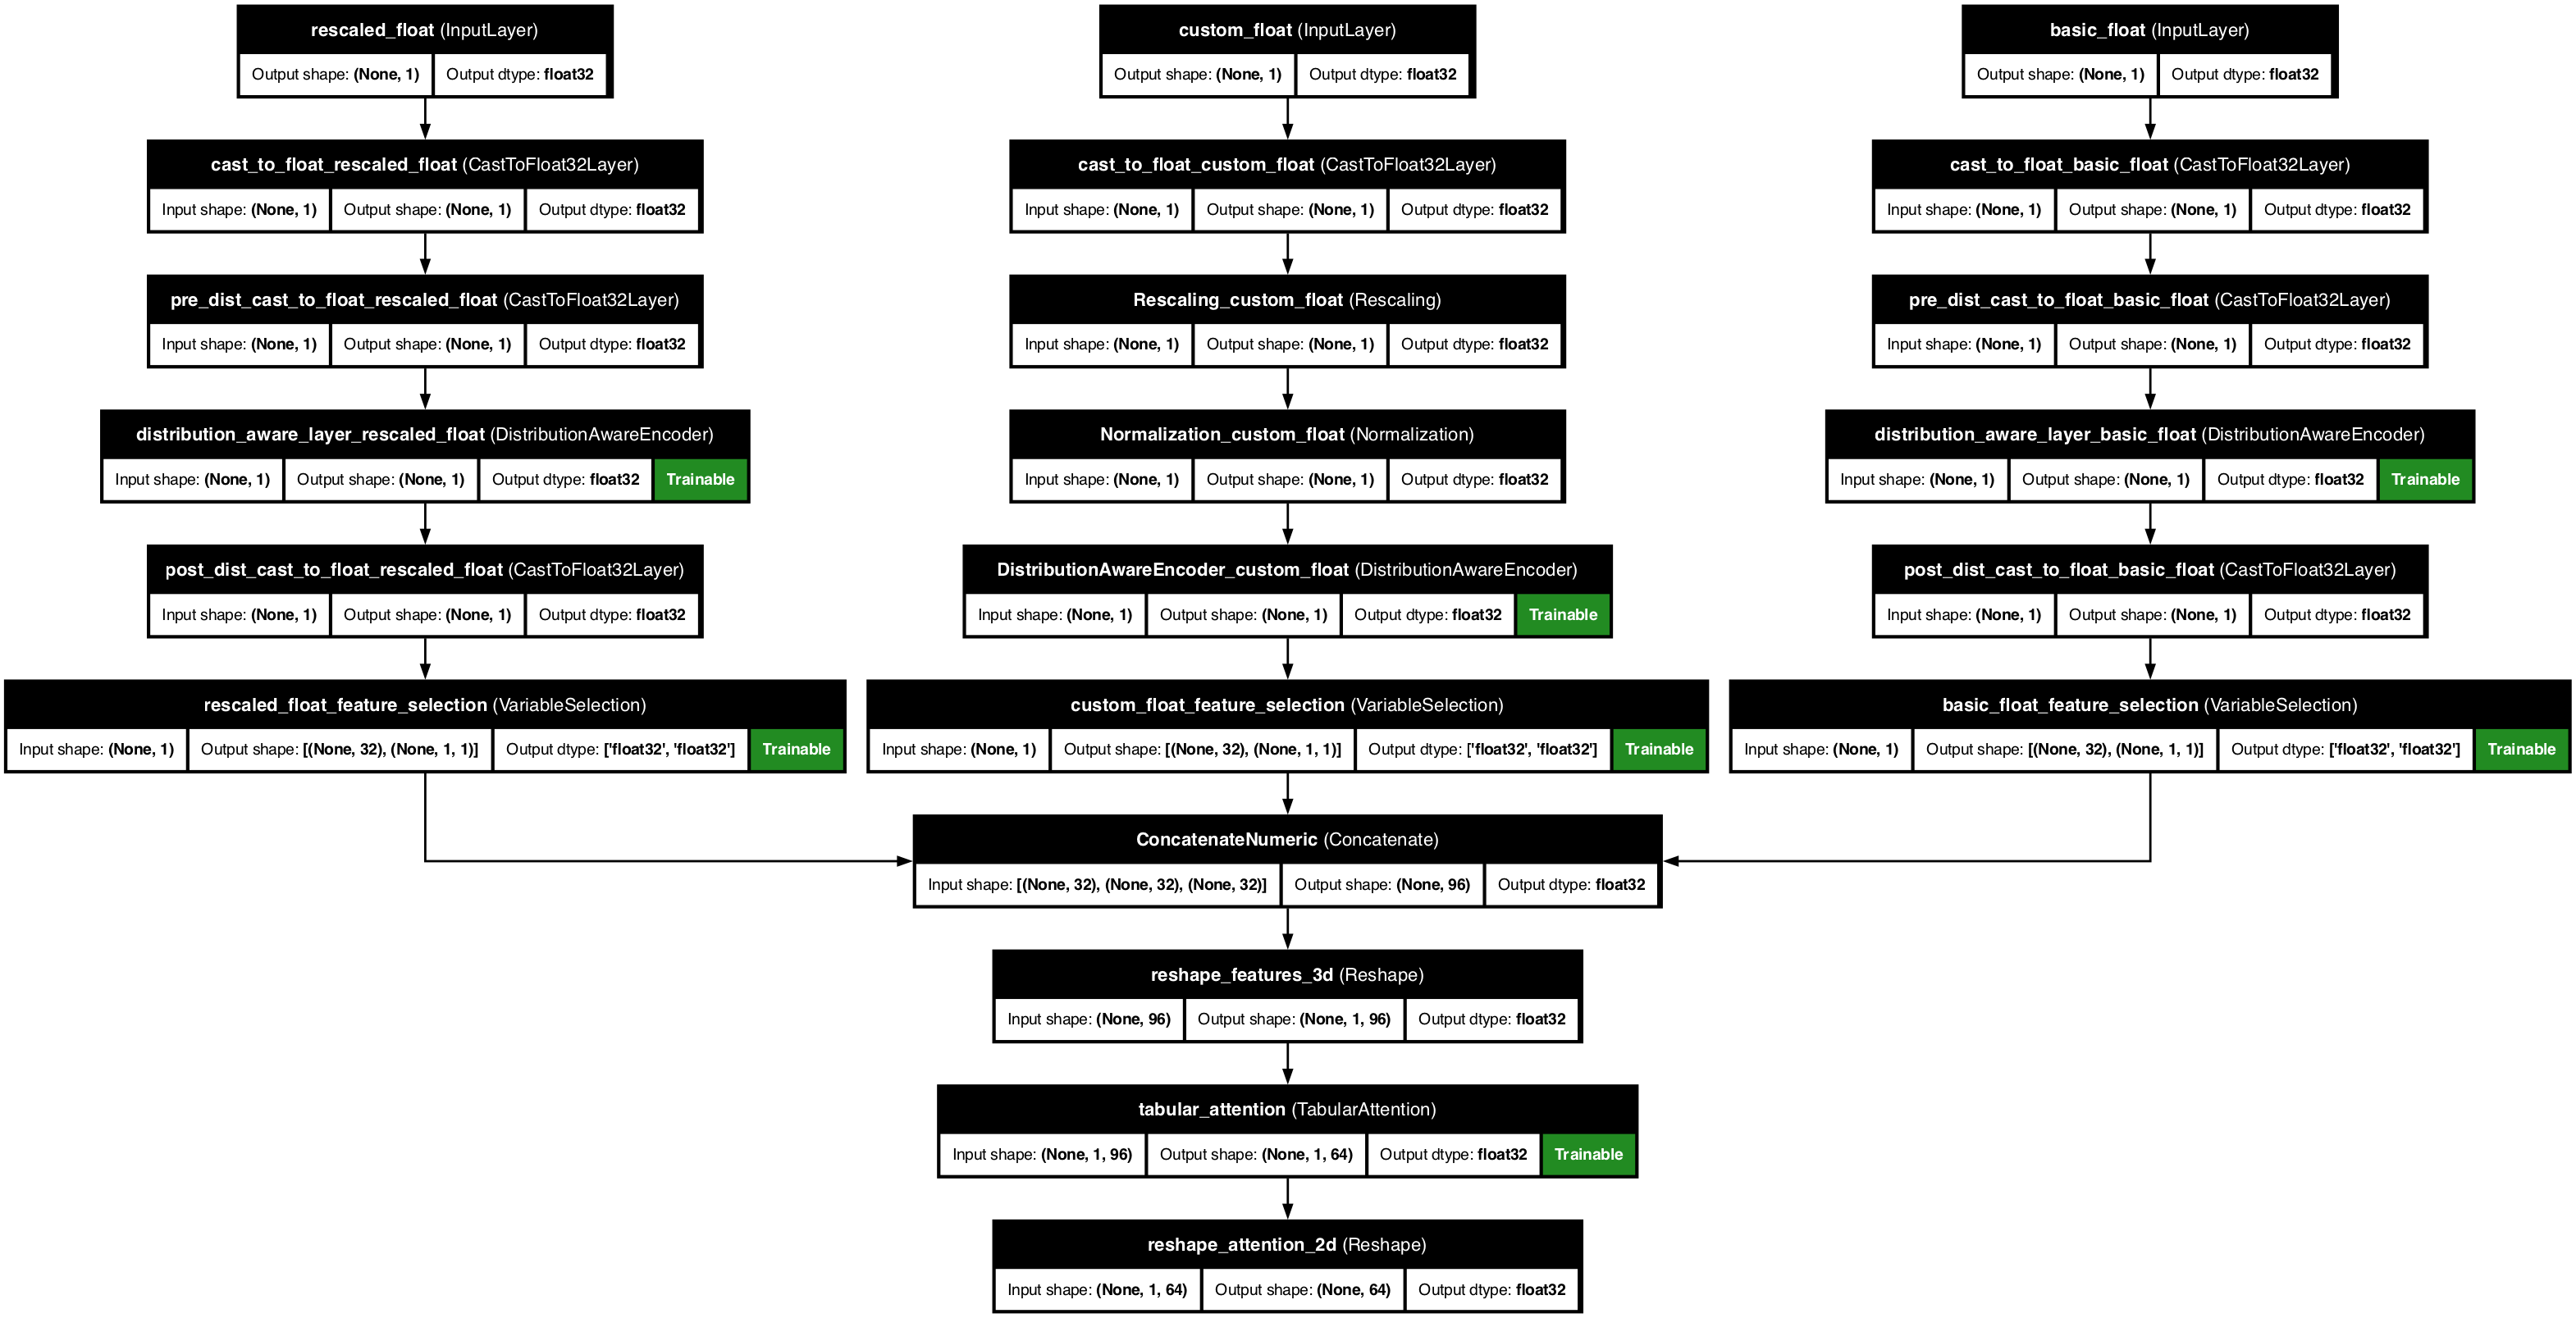
Example 4: Numerical features with distribution aware encoder
Normally the distribution aware encoder works well in automatic mode, once use_distribution_aware=True is set. However we can also manually set the prefered distribution for each numerical feature if we would like to.
from kdp.features import NumericalFeature, FeatureType
from kdp.processor import PreprocessingModel, OutputModeOptions
from kdp.layers.distribution_aware_encoder_layer import DistributionAwareEncoder


# Define features
features = {
    # 1. Default automatic distribution detection
    "basic_float": NumericalFeature(
        name="basic_float",
        feature_type=FeatureType.FLOAT,
    ),

    # 2. Manually setting a gamma distribution
    "rescaled_float": NumericalFeature(
        name="rescaled_float",
        feature_type=FeatureType.FLOAT_RESCALED,
        scale=2.0,
        prefered_distribution="gamma"
    ),
    # 3. Custom preprocessing pipeline with a custom set normal distribution
    "custom_float": NumericalFeature(
        name="custom_float",
        feature_type=FeatureType.FLOAT,
        preprocessors=[
            tf.keras.layers.Rescaling,
            tf.keras.layers.Normalization,
            DistributionAwareEncoder,
        ],
        bin_boundaries=[0.0, 1.0, 2.0],
        mean=0.0,
        variance=1.0,
        scale=4.0,
        prefered_distribution="normal"
    ),
}

# Now we can create a preprocessing model with the features
ppr = PreprocessingModel(
    path_data="sample_data.csv",
    features_specs=features,
    features_stats_path="features_stats.json",
    overwrite_stats=True,
    output_mode=OutputModeOptions.CONCAT,

    # Add feature selection to get the most important features
    feature_selection_placement="numeric", # Choose between (all_features|numeric|categorical)

    # Add tabular attention to check for feature interactions
    tabular_attention=True,

    # Add distribution aware encoder
    use_distribution_aware=True
)

# Build the preprocessor
result = ppr.build_preprocessor()

# Transform data using direct model prediction
transformed_data = ppr.model.predict(test_batch)

# Get feature importances
feature_importances = ppr.get_feature_importances()
ppr.plot_model("model_with_distribution_aware.png")
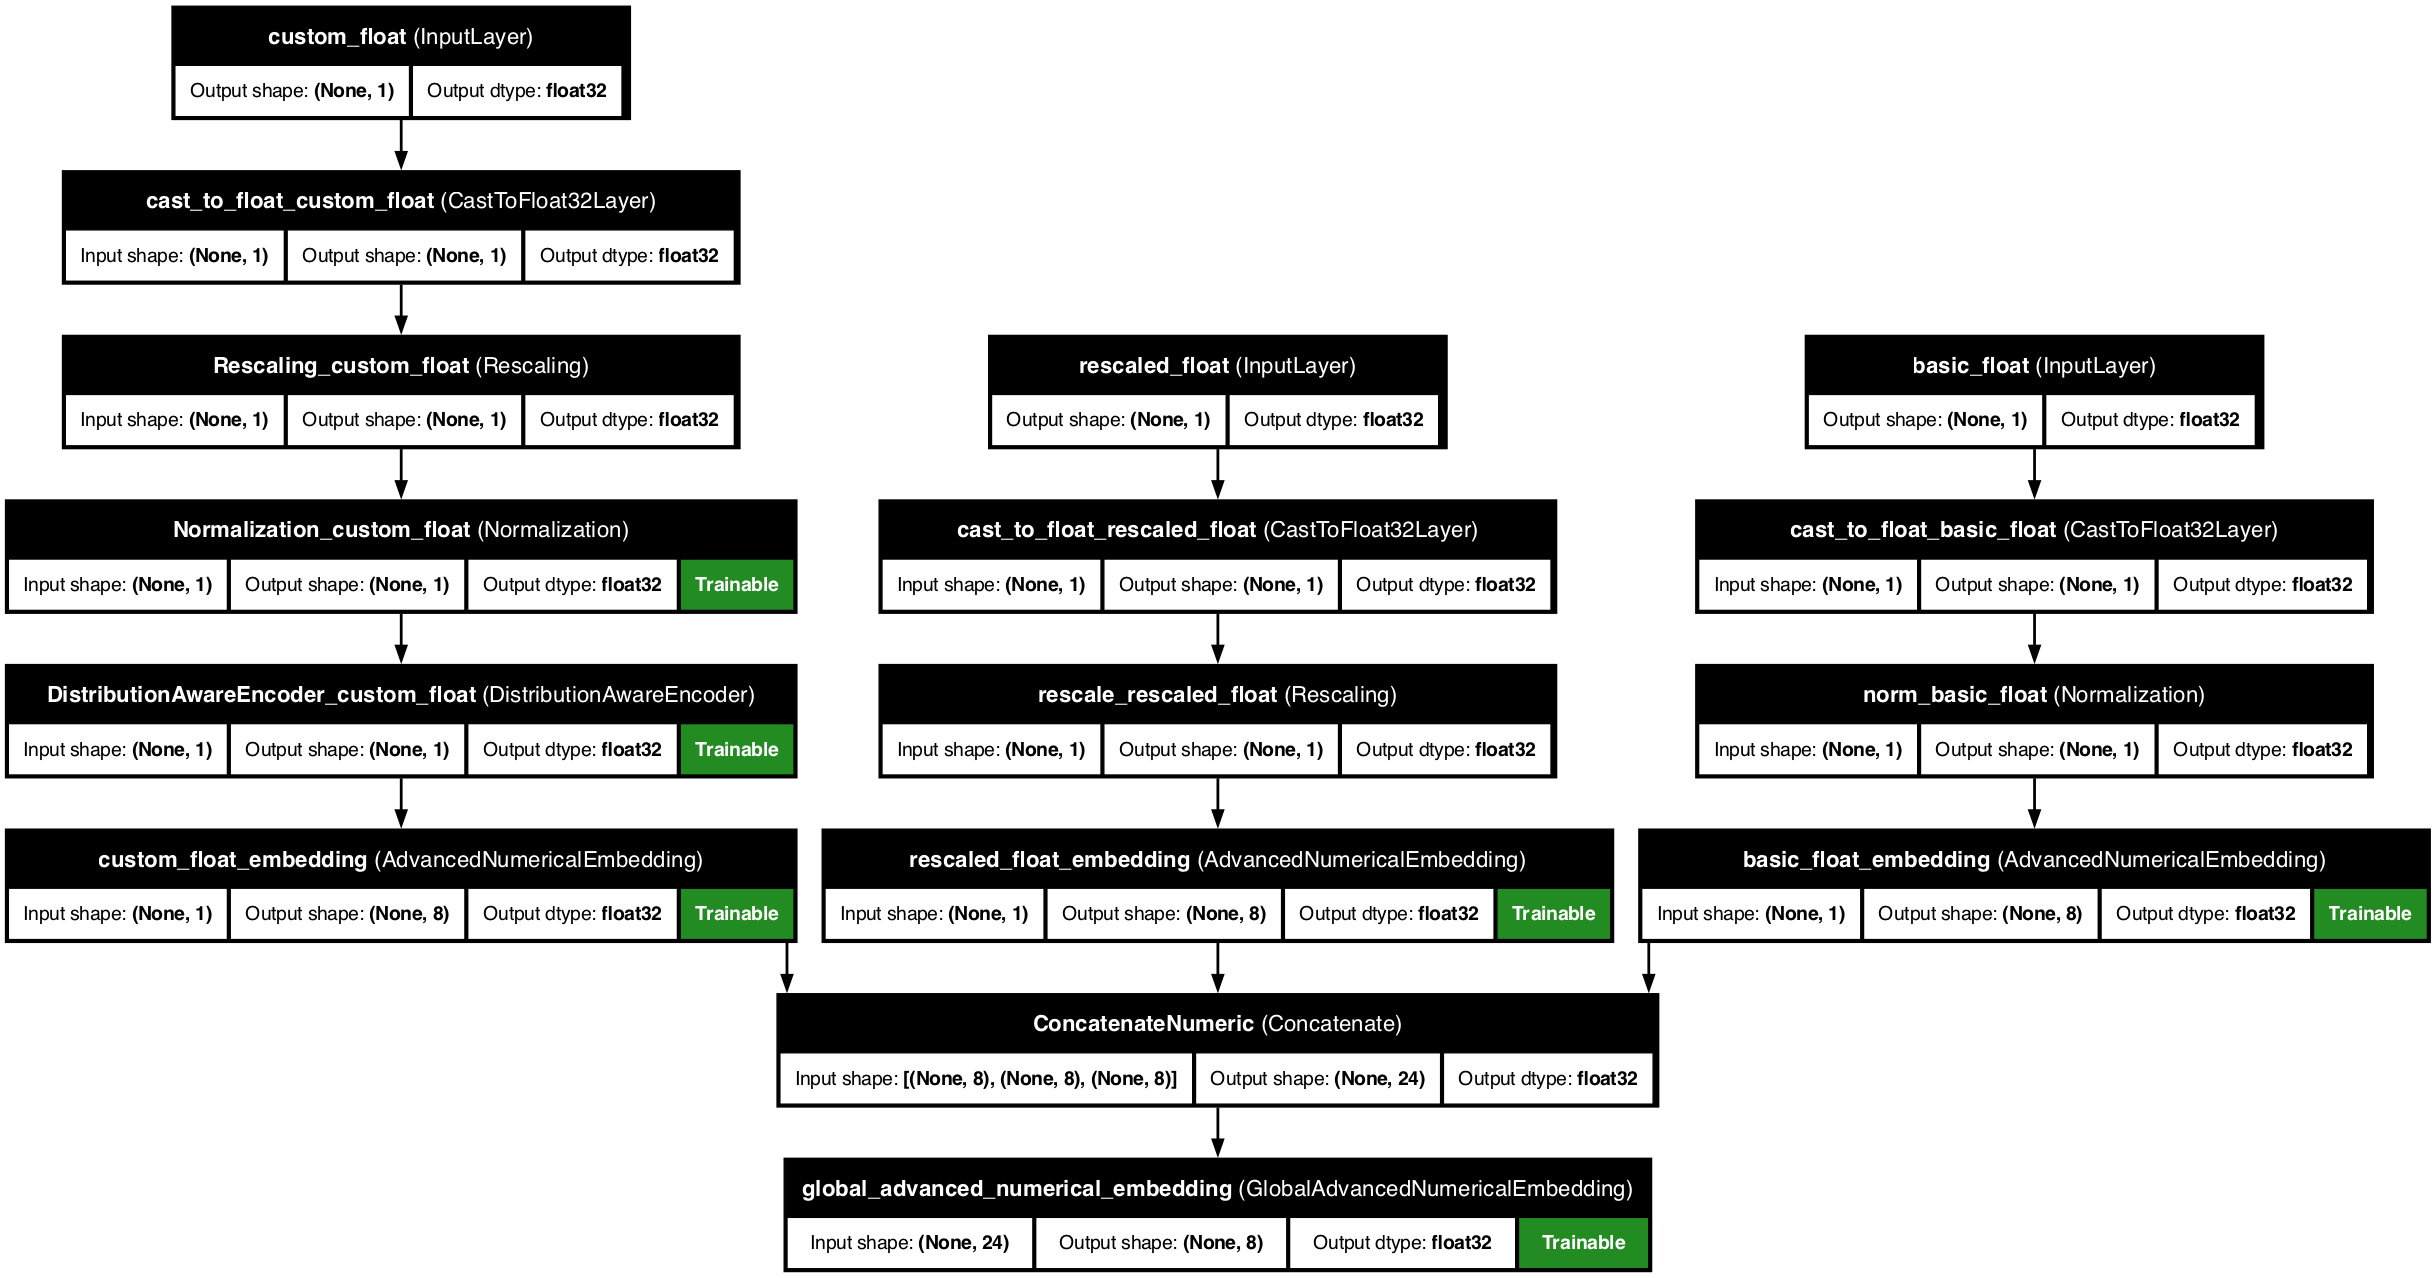
Example 5: Numerical features with numerical embedding
Numerical embedding is a technique that allows us to embed numerical features into a higher dimensional space. This can be useful for capturing non-linear relationships within/between numerical feature/s.
from kdp.features import NumericalFeature, FeatureType
from kdp.processor import PreprocessingModel, OutputModeOptions


# Define features
features = {
    "basic_float": NumericalFeature(
        name="basic_float",
        feature_type=FeatureType.FLOAT,
    ),

    "rescaled_float": NumericalFeature(
        name="rescaled_float",
        feature_type=FeatureType.FLOAT_RESCALED,
        scale=2.0,
    ),

    "custom_float": NumericalFeature(
        name="custom_float",
        feature_type=FeatureType.FLOAT,
        preprocessors=[
            tf.keras.layers.Rescaling,
            tf.keras.layers.Normalization,
            DistributionAwareEncoder,
        ],
    ),
}

# Now we can create a preprocessing model with the features
ppr = PreprocessingModel(
    path_data="sample_data.csv",
    features_specs=features,
    features_stats_path="features_stats.json",
    overwrite_stats=True,

    # Add numerical embedding
    # Use advanced numerical embedding for individual features
    use_advanced_numerical_embedding=True,
    # Use global numerical embedding for all features
    use_global_numerical_embedding=True,

    output_mode=OutputModeOptions.CONCAT,
)

# Build the preprocessor
result = ppr.build_preprocessor()

# Transform data using direct model prediction
transformed_data = ppr.model.predict(test_batch)

# Get feature importances
feature_importances = ppr.get_feature_importances()
ppr.plot_model("model_with_advanced_numerical_embedding.png")